
Steps to Set Up Email in Outlook for Windows
Step One: Add a New Account
In Outlook, go to File > Info > Add Account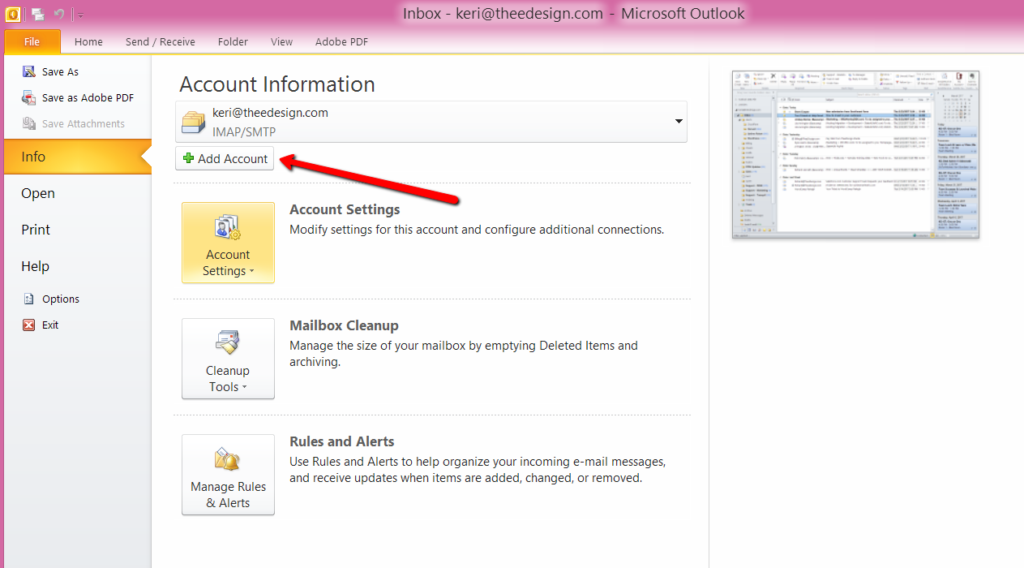
Step Two: Enter Your Login Credentials
Enter your name, email address, and password that was provided to you by our team. Then click Next. Your email will now try to configure itself automatically.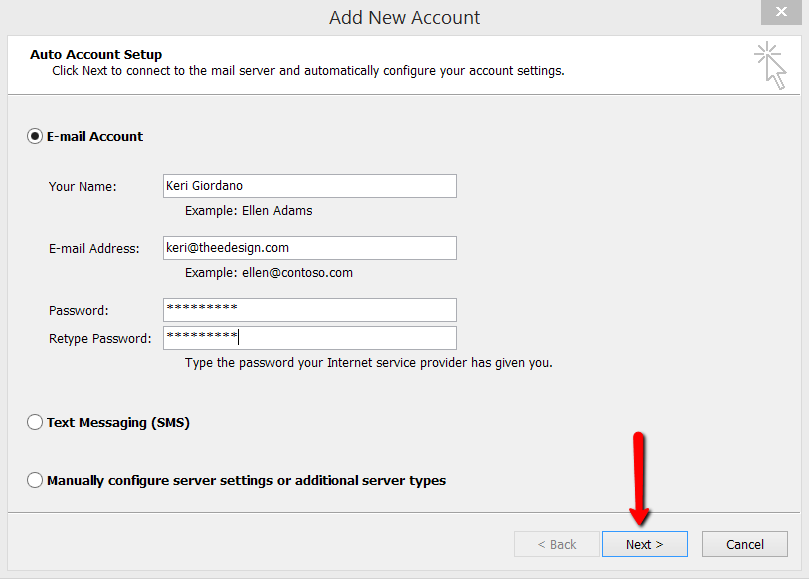
Step Three: Go To Account Settings
Now let’s check your server settings. Go to File > Info > Account Settings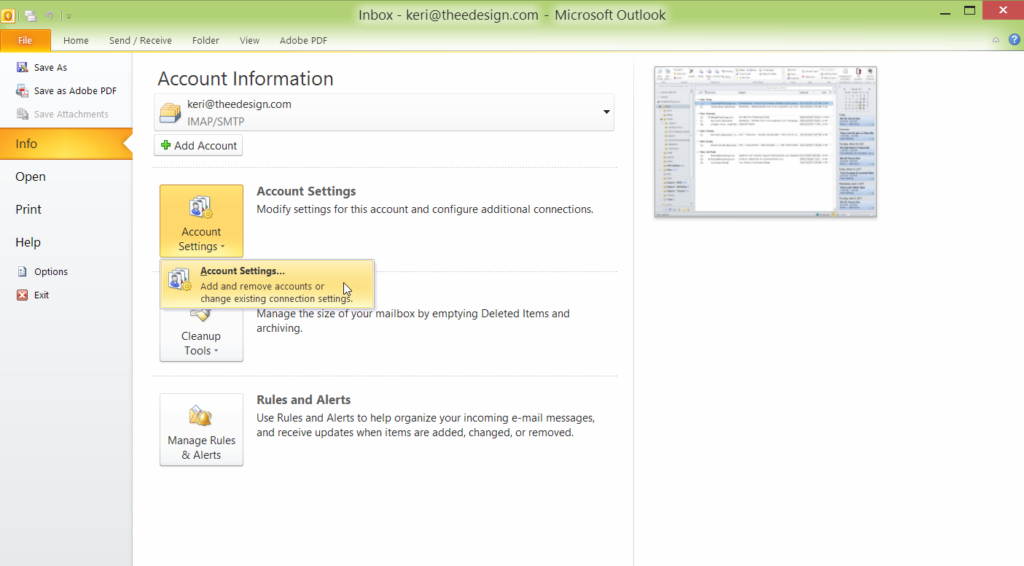
Step Four: Select Your Email Account
Double click on the email account you want to check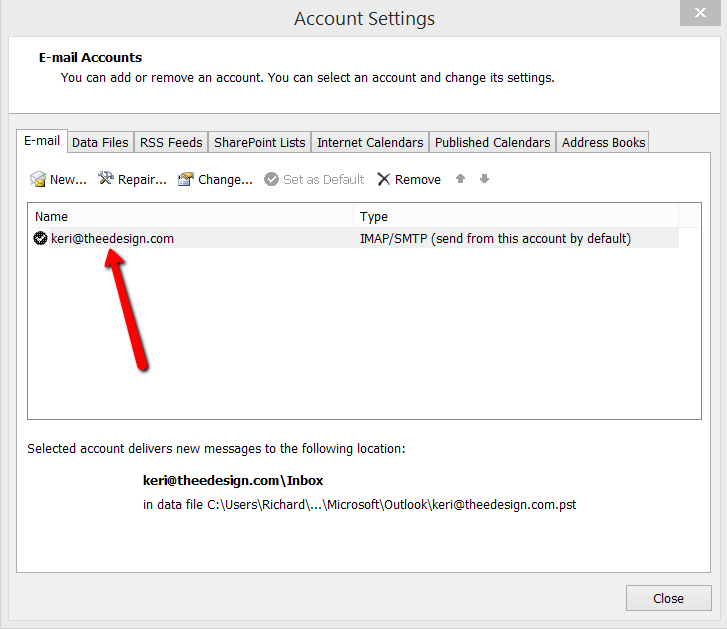
Step Five: Enter The Incoming and Outgoing Mail Server Info
If TheeDigital is hosting your email, make sure that BOTH the incoming and outgoing servers are mail.yourdomain.com (for example, mail.theedesign.com). Then click More Settings.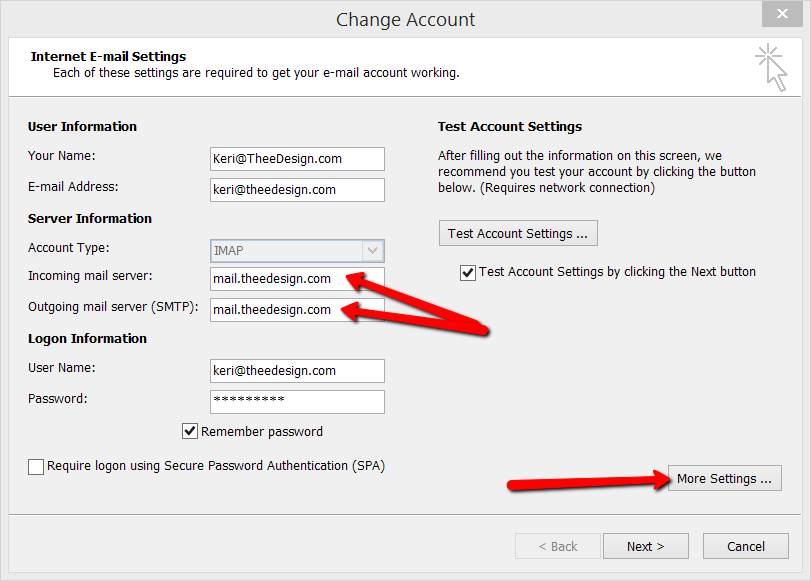
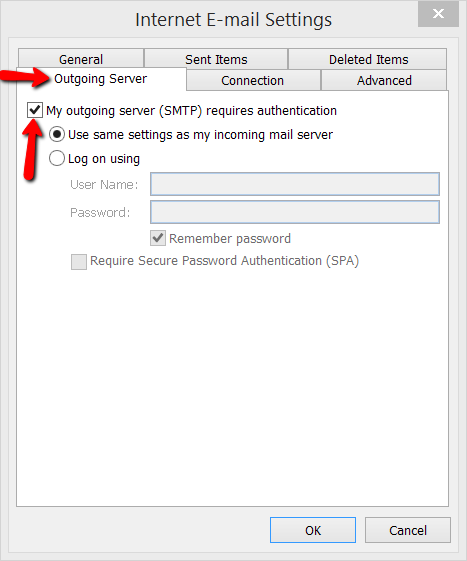
Step Six: Make Sure The Outgoing Server Requires Authentication
- Click the Outgoing Server tab.
- Check your outgoing server settings and make sure the box for “My outgoing server (SMTP) requires authentication” is checked.
- Use the same settings as your incoming mail server. (No need to re-enter your username and password)
- Click OK
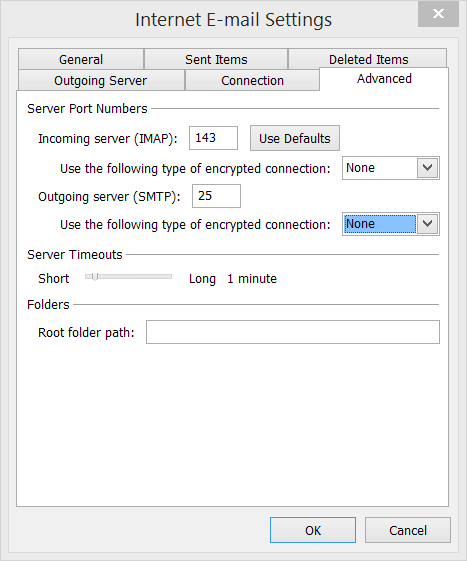
Step Seven: Check Your Server Ports
- Click on the Advanced tab and check your port settings.
- 143 for incoming and 25 for outgoing. Click OK.
Step Eight: Last Step! Send Test Message
Click Next on the Account screen and then Outlook will send you a test message and confirm that your email has been set up!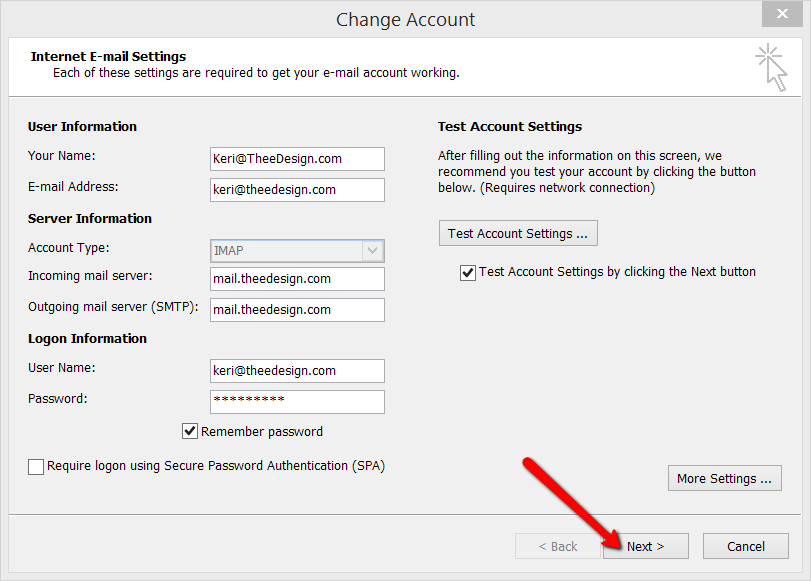
Looking for an experienced web design agency that can create a professional looking website for you that is search engine friendly and easy to manage? Contact our award-winning web designers and internet marketing professionals in Raleigh, NC at 919-341-8901 or schedule a complimentary consultation and website review.
Tags: Support
Keri Rosemond
VP of Operations
Meet Keri Rosemond, VP of Operations at TheeDigital. With a passion for business growth and digital marketing, Keri shares insights on web design, SEO, and digital strategy. Explore her articles and expert advice for taking your business to the next level.