

Your WooCommerce product categories can turbocharge your ecommerce store. Customers will benefit from an improved browsing experience, while you’ll have the advantage of streamlining products and making more sales! Cleverly designed categorization solutions ensure that finding what they need is much easier than ever before – saving time for both customers and business owners alike.
In this article, our WooCommerce development team will take you through the steps to add your product categories.
What are WooCommerce Product Categories?
A user-friendly way to make the shopping experience more enjoyable is by grouping products into categories, such as ‘shirts’, ‘shorts’ and ‘swimwear’, in your WooCommerce store. This helps shoppers find what they’re looking for quickly – improving their chances of buying something!
How to Create a Product Category in WooCommerce
1. From your WordPress dashboard, go to Products > Categories.
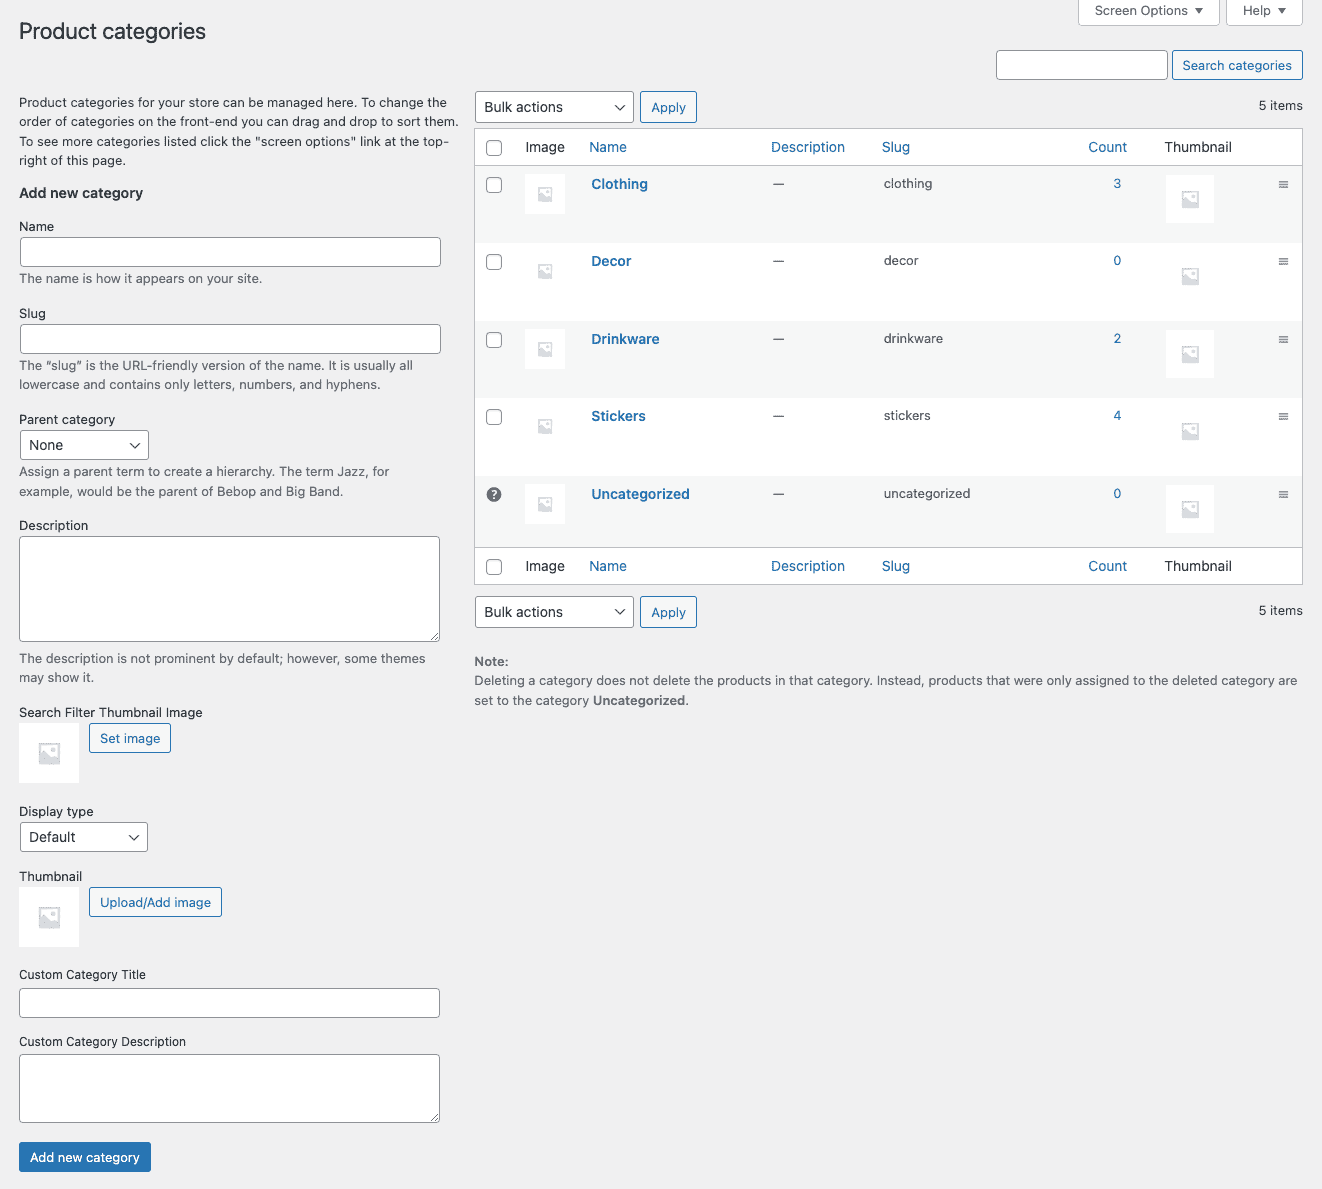
- Add a Name for your category that best describes the product group.
- Add a Slug (optional). It will auto-generate if left blank.
- Choose a Parent if this is a subcategory.
- Enter a Description if you want your customers to have a better understanding of the category.
- Choose the Display Type. This is where you can choose what displays on the category’s landing page. Typically set to default.
- Next, you can upload or add an image. This is optional, but it may be a good idea if your theme showcases an image for product categories. Adding an image is a great way to help your customers easily identify what they’re searching for.
- Submit the Add new category button and your new category has been created.
How to Display Products by Category in WooCommerce
It’s important to create an intuitive user experience on your WooCommerce store. To help you do this, we’ll explore the most popular option for displaying products by category that can make a big impact on customers!

Create a WooCommerce Category Menu
1. On the menus page (Appearance > Menus), go to the top of the page and click the white Screen Options button.
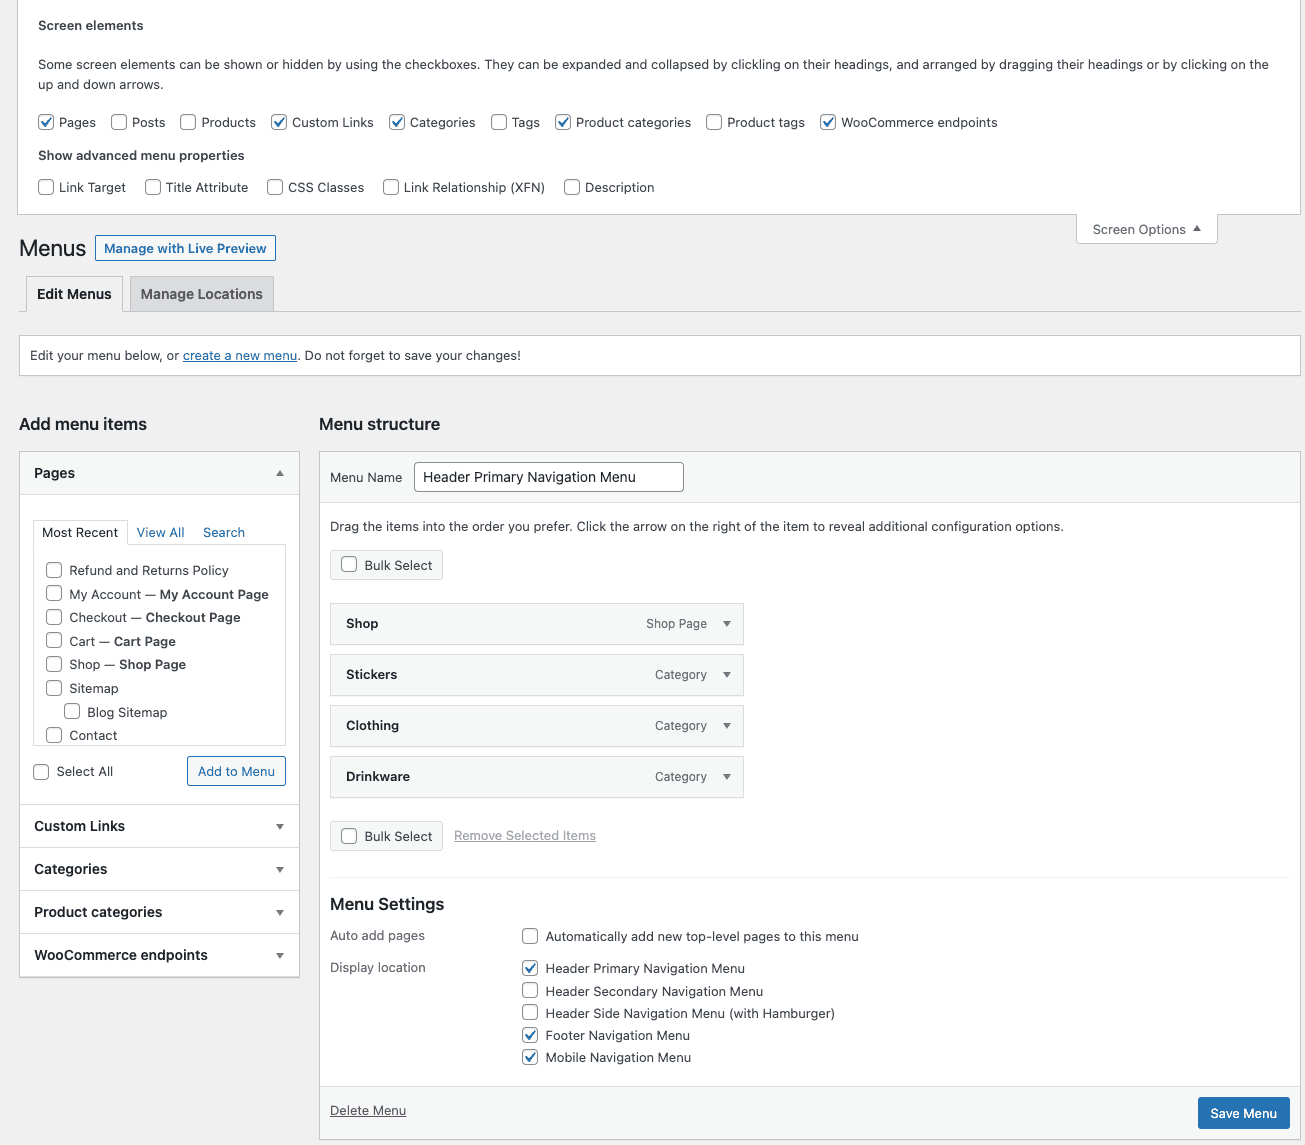
2. The top of the page should showcase a box with different display options. Check the Product Categories box. An option to the left in the Add menu items section should appear.
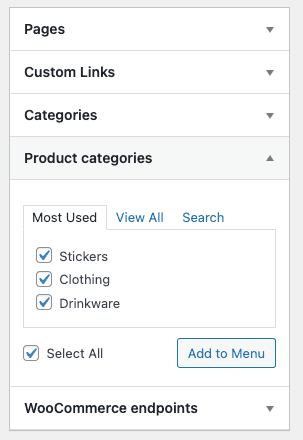
3. Click on the Product categories tab in this section to open it up. Then, click the checkbox next to each category you want to add to the menu.
4. Once you’ve made your selection, click the Add to the Menu button and they’ll be added to the Menu structure section.
5. You should now be able to drag and drop each menu item in the menu to re-order them. If you’d like to create a dropdown menu, you can drag a menu item beneath the parent item. This will create a sub-item and allow a dropdown menu on your navigation.
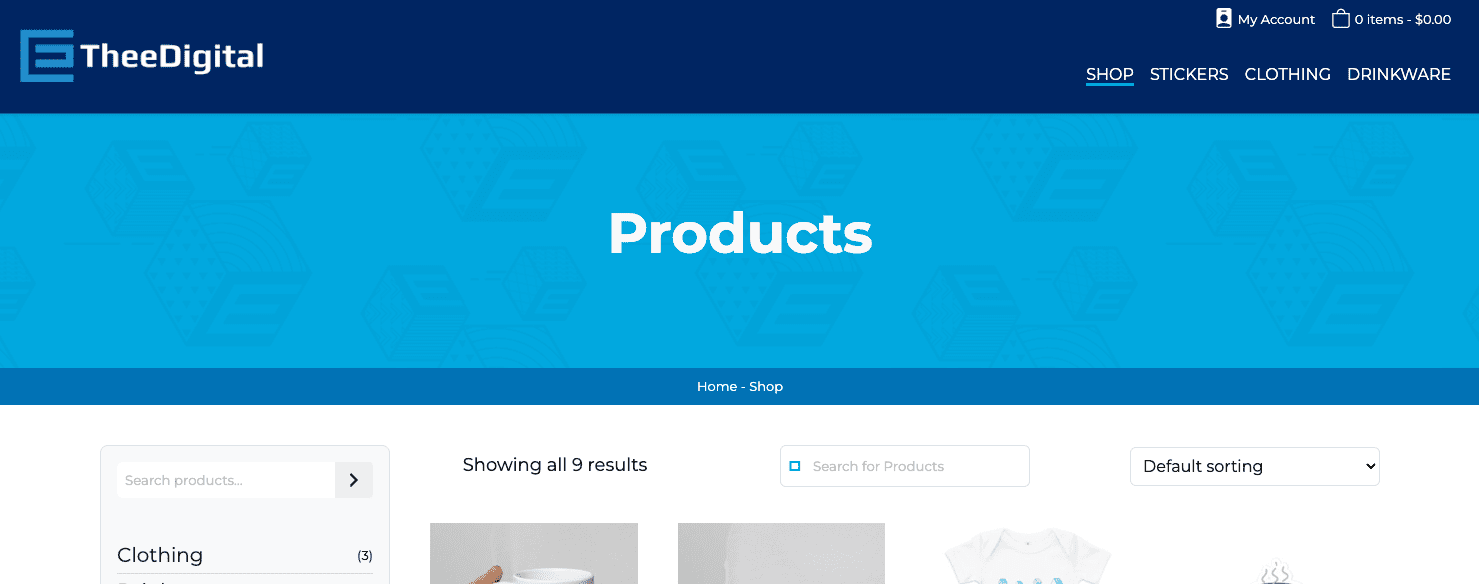
6. Once done, click the blue Save Menu. The product categories should now appear in your store.
Contact Us for Expert WooCommerce Website Development Today
Looking for an experienced web development agency that can help optimize and streamline your WooCommerce store? Contact our award-winning WooCommerce website developers and ecommerce marketing professionals at 919-341-8901 or schedule a complimentary consultation and website review.
Tags: WooCommerce • Support
Garrett Johnson
Garrett Johnson is a Project Manager at TheeDigital. He helps design and develop lead-converting WordPress websites.